Taking a screenshot on Windows 11 is a simple yet essential skill, useful for everything from capturing errors for troubleshooting to saving online receipts. In Windows 11, Microsoft has introduced several convenient methods to capture screenshots. Most of these methods are also worked on Windows 10 too.
This guide will provide a step-by-step process to take a screenshot on Windows 11, which is as easy as pressing a few buttons.
How to Screenshot on Windows 11
1. Print Screen (PrtScn) Key
The simplest way to take a screenshot on Windows 11 is by using the Print Screen (PrtScn) key on your keyboard.

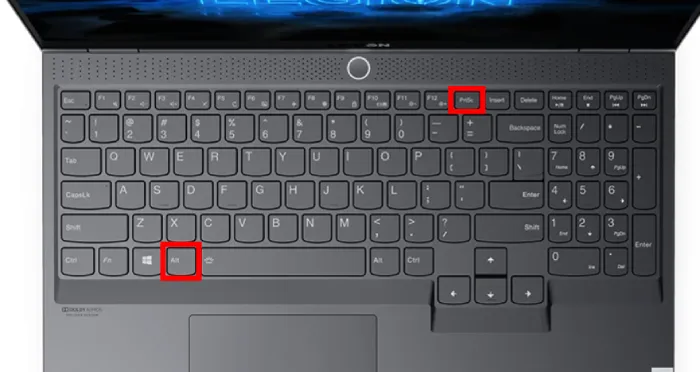
- Full Screen Capture: Press
PrtScnto copy an image of your entire screen to the clipboard. You can paste it into an application like Paint or Word. - Active Window Capture: Click on the window you want to capture and press
Alt + PrtScn. This will take a snapshot of the active window.
2. Windows + Print Screen
For a screenshot that immediately saves as a file:

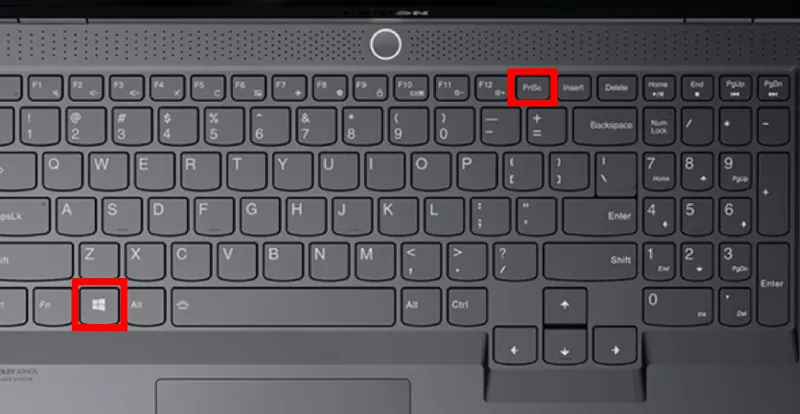
- Press
Windows Key + PrtScn. Your screen will briefly dim, and the screenshot will be automatically saved in the Pictures > Screenshots folder.
3. Snipping Tool
The Snipping Tool is a built-in Windows app that allows for more precise screenshots:
- Open the Snipping Tool from the Start menu.
- Click
Newand select the area of the screen you wish to capture. - You can choose different snip types such as rectangular, free-form, window, or full-screen.
- Save the image or edit it within the Snipping Tool.
4. Snip & Sketch
This tool is an updated version of the Snipping Tool with more features:
- Press
Windows Key + Shift + S. The screen will dim, and you’ll see a small menu at the top of your screen, allowing you to choose the type of screenshot. - After capturing, the screenshot is copied to the clipboard, and you can paste it into another program.
5. Game Bar

For gamers and those needing video captures as well:
- Press
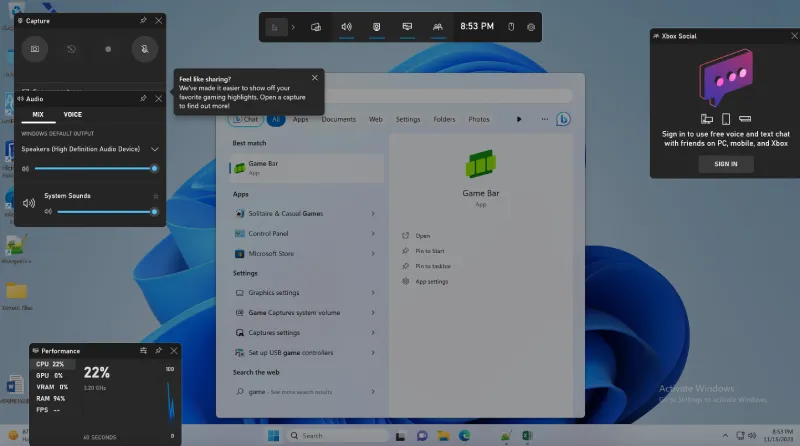
Windows Key + Gto open the Game Bar. - Click on the camera icon to take a screenshot, or use
Windows Key + Alt + PrtScn. - The screenshot will be saved to the Videos > Captures folder.
6. Third-party Applications
There are numerous third-party applications available that offer extensive features like delayed captures, annotation, and sharing options. Research and download one that fits your needs.
Practical Tips (FAQs)
Q: How do I take a screenshot on a dual monitor setup?
A: Pressing PrtScn or Windows Key + PrtScn captures all monitors in one screenshot. Use the Snipping Tool or Snip & Sketch for more control over specific monitors.
Q: Can I take a screenshot without any of these key combinations?
A: Yes, voice-activated assistance like Cortana can help take screenshots through voice commands.
Q: Where are screenshots saved when using Windows Key + PrtScn?
A: They are saved in the Pictures > Screenshots folder.
Conclusion
Windows 11 offers a variety of methods to accommodate different screenshot needs. Whether you need a quick full-screen capture, a specific window, or a region, Windows 11 has the right tool for the job. These methods ensure you can easily share information, save for later reference, or capture important moments from your computer screen.
Explore our related guides for taking screenshots on other platforms:
- Take Screenshots In ChromeBook
- Screenshot on Mac
- Screenshot on Linux
Remember to frequently check for updates to your operating system, as Microsoft regularly introduces new features that could further streamline the screenshot process.


